
CERAMICS
Veneers & Implants Using the Latest Material Choice: Celtra Press
by Edwin Kee MCDT
24 June 2018
For some time now, all-ceramic materials have been the go-to category of materials for any and all restorative cases; from single units to bridges, to veneers and implant-supported restorations. It’s true that materials such as lithium disilicate and zirconia have become the No.1 choice for dental professionals, but this is due in part to the limited selection of quality materials actually available that offer superior esthetics and reliable strength.
Now, dental manufacturers are finally developing materials that have an even higher strength and improved esthetics for optimum results – materials that will not “grey out”, have less of a reaction layer, and the precision of the long sought-after, true chameleon effect that mimics natural teeth. Dentsply Sirona Prosthetics recently launched a material exclusively for labs called Celtra Press which is akin to the chairside millable Celtra DUO. Celtra Press is composed of zirconia reinforced lithium silicate (ZLS) which is a pressable material.
Dentists are always looking to provide better esthetics for patients and, at the same time, a higher strength for long-lasting and reliable restorations. As dental technicians, we are always striving to find a material that somewhat harmonizes with nature to create the most natural looking restoration.
Celtra Press provides technicians with a material that blends into the natural dentition, creating exquisite esthetics and offering unparalleled strength. Celtra Press can be used in all types of restorations including crowns, veneers, posterior bridges up to 3 units, and implant restorations.

Fig. 1 Patient preoperative image.

Fig. 2 Wax-up of the new crown.

Fig. 3 Wax-up of implant site Nos. 11 and 12.
Case Presentation:
The patient previously had implants placed on tooth Nos. 11 and 12, and No.12 required another restoration. The implant position on tooth No.12 was not ideal to restore or be splinted because of its location. If restored alone, the patient would be unable to clean under the implant. The patient was also not happy with other anterior teeth due to erosion (Fig. 1).
Treatment Plan:
After consulting with the dentist, we decided to apply veneers on teeth Nos. 6-10, and a cantilever implant on teeth No.11 and No.12. We discussed material choices at length, as we knew that we can make veneers out of an all-ceramic material, but what were we going to use to restore the implant and cantilever on the pre-molar to get the best esthetic results for this case? We decided to go with Celtra Press because of its strength, and the chameleon effect it provides to blend the restorations with the surrounding natural dentition as well as the implant. Celtra Press is strong enough to act as an implant restoration, and also provide a cantilever to fill in the missing tooth behind it.
Step by Step:
The doctor sent over a model and the physical case was poured and mounted. A UCLA abutment was ordered for implant site No.11. We waxed-up the case in preparation for a new smile (Figs. 2 and 3).
All working movements were checked beforehand to ensure that there were no interferences. Margins were also checked to make sure they were all closed. The wax-ups were then sprued with a No. 8-gauge round wax with a 4mm length (Fig. 4).
A No. 8-gauge round wax was also used for the implant restorations. The bridge restoration sprue was made into a U shape and sprued to one proximal side of the wax up (Fig. 5). The reason the sprue was prepared differently is because Celtra Press has such fine crystal particles that only one sprue is needed.

Fig. 4 Sprued wax-ups using 8-gauge wax.

Fig. 5 Bridge restoration with one sprue “U” shape and veneers sprue in base former.

Fig. 6 Celtra Press investment.

Fig. 7 Invested ring.

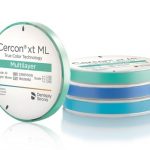
Fig. 8 Celtra Press ingots.

Fig. 9 Clean restorations removed from investment.

Fig. 10 Restorations after removal from ring.
The restorations were then placed on the pressing ring. The bridge was sprued to the side of the pressing former. It was then invested with Celtra Press investment, with the water/liquid ratio measured following recommendations by the manufacture (Fig. 6). The invested ring was then bench set for 20 minutes and placed in a hot burn-out oven (Fig. 7). The rings were burned out for 45 minutes, with 20 minutes added for each additional ring.

Fig. 11 Restorations seated onto the model to check margins and proximal contacts.
We decided to go with Celtra Press because of its strength, and the chameleon effect it provides to blend the restorations with the surrounding natural dentition as well as the implant.

Fig. 12 Lightly cut back incisal third.
The invested ring was then placed in the press oven, following the perimeters that the manufacture recommends for pressing the Celtra Ingots into the mold. In this case, the implant wax-up was pressed in a [LT] ingot and the veneers in an [HT] ingot (Fig. 8).
After pressing, the rings were left to cool down to room temperature. Once cooled, the rings were devested with glass beads to remove the investment
from the restorations (Fig. 9). From just devesting, we can see that there was very little reaction layer left on the restorations. By blasting it with glass beads, the reaction layer was easily removed with no additional cleaning or solution required. (Fig. 10).
The restorations were then seated back onto the model and titanium connections to check the margins and proximal contacts (Fig. 11). Once checked, the restorations were lightly cut back on the incisal 3rd for a porcelain application (Fig. 12). The cut back restorations were then cleaned in the ultrasonic unit to remove any residue of the cutback and/or contamination from our hands.

Fig. 13 Celtra Ceram application for a natural look.

Fig. 15 Glazed restorations.

Fig. 17 Restorations: Try in at day of delivery.

Fig. 19 Full-smile image.

Fig. 14 Contoured and polished to harmonize with surrounding teeth.

Fig. 16 Titanium base and implant.

Fig. 18 View from the side, ideal occlusion.

Fig. 20 Patient was extremely happy with the results.
Celtra Press is a great material when it comes to different types of restorations, such as veneers, crowns, or implants. In all cases, it provides a natural-looking restoration that has an amazing chameleon effect…
Enamel and Effect porcelain utilizing Celtra Ceram were then placed on the restorations to achieve a more natural-looking restoration as opposed to a monochromatic restoration achieved with stains (Fig. 13).
The restorations were then fired in the porcelain oven on the Power Firing cycle. The Power Firing cycle raised the strength of the restorations even further to >500 MPa, and as a dentin firing for the porcelain that was applied.
The veneers and implant bridge were contoured and polished to shapes that perfectly harmonized with the surrounding teeth, and then placed in the porcelain oven to be glazed (Figs. 14 and 15). The titanium base was then cemented to the implant bridge utilizing resin cement (Fig. 16).
Restorations at day of delivery (Figs. 17-20). The doctor and patient were extremely happy with the outcome.
Celtra Press is a great material when it comes to different types of restorations such as veneers, crowns or implants. In all cases, it provides a natural looking restoration that has an amazing chameleon effect, blending in beautifully with surrounding teeth. Its strength and ease of use make Celtra Press the latest and greatest material solution for lab technicians.


