CAD/CAM
Dentsply Sirona’s inLab® System:
Versatile Digital Solution
Challenging Occlusal PREPLESS ONLAYS CASE Made Easy with Sirona Connect, inLab® Software, and inLab® MC X5
by Edwin Kee, MCDT
3 October 2018
As dental laboratory professionals, we’ve known about CAD/CAM for more than 20 years. When we go to trade shows, we see CAD/CAM systems pretty much in every booth. As a dental technician, you may wonder: Which system will fit all of my restorative requirements? Should I choose open or closed architecture? What materials can it mill? Should I choose a dry or wet mill? Will the company that I purchased from provide me the support that I need? These and a thousand other questions go through our minds before purchasing a CAD/CAM system, because it is one of the most important and expensive purchases we will make as laboratory managers.
Dentists currently have the ability to scan, design, and mill their own restorations, but, in reality, most dentists don’t have the desire or time to design a big or complicated case, so they hire in-house laboratory technicians or have their assistants design and mill. That said, the inLab system is a laboratory’s best friend, because, with Sirona Connect, the dentist can digitally share their cases with an inLab laboratory of choice. Laboratories don’t have to do pick-ups, and using inLab software, inLab MC XL, or inLab MC X5, they can design and mill anything from PMMA and glass to a wide variety of zirconia materials. The file can also be converted to an STL, if needed, in order to send to a different milling system. Moreover, the inLab system can mill a ceramic full contour crown in less than 10 minutes. It is a system that can produce a great number of restorations in a short period of time and, in turn, can greatly increase profits and foster better working partnerships with clients.
Laboratories don’t have to do pick-ups, and using inLab software, inLab MC XL, or inLab MC X5, they can design and mill anything from PMMA and glass to a wide variety of zirconia materials.
Case Presentation:
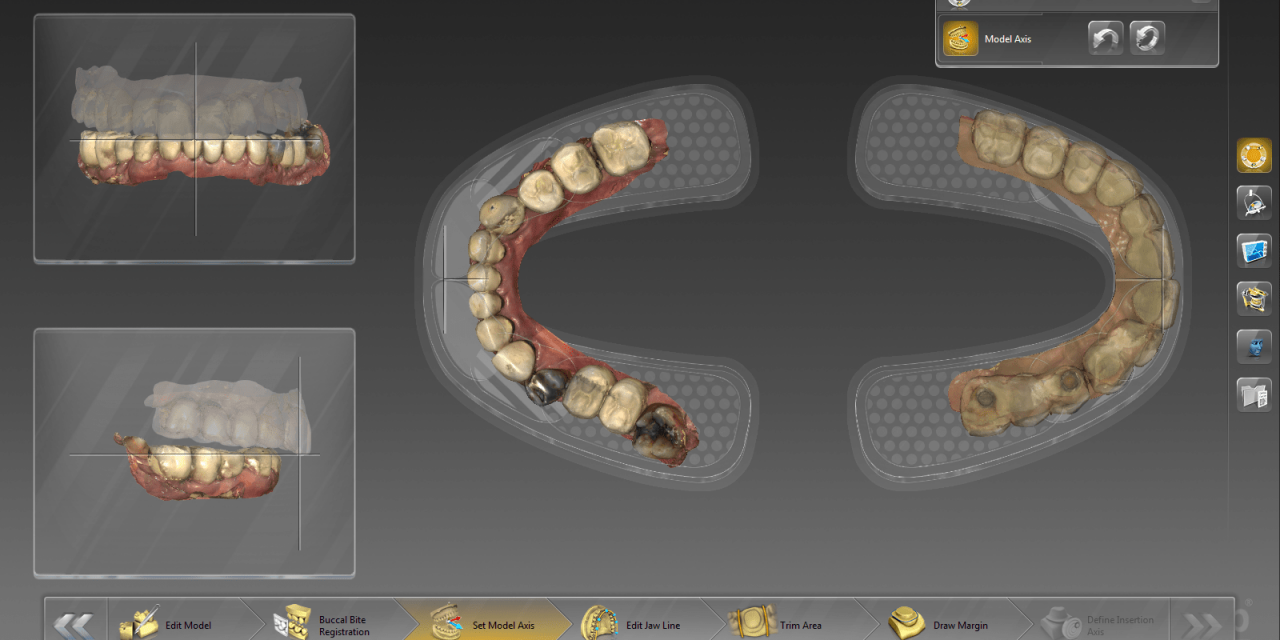
I received a case digitally from Dr. Alvarado via Sirona Connect (Figure 1). He wanted to open the vertical dimension of occlusion (VDO) of the patient by restoring lower teeth Nos. 19 through 30 with prepless onlays — “vonlays” (facial veneer and occlusal on- lays) — and also do a test run on the patient using PMMA before creating the permanent restorations.
Using the inLab CAD software, I went into the “Model Mode,” where I first set both the upper and lower sections to the correct occlusal plane. The bite was then checked to make sure everything was precise (Figure 2). Since the tooth was not yet prepped and there were no margins to go by, I manually created the margins in the software to blend perfectly into the tooth. I then marked the margins accordingly (Figure 3).
Fig. 1 Case received through Sirona Connect.
Fig. 3 Checking the margins with the inLab CAD software.
Using the “Design Mode,” the path of insertion was then decided for each tooth to make sure there was a proper way to insert the new restorations. We also specified the undercuts, because the natural tooth undercuts would be removed by the software, and several undercuts would be removed in the mouth. Parameters were then set for the cement spacers, contact strength, block-out undercut, and thickness of the PMMA material.
In this case, creating the restorations was not a straightforward task since we were working with all-natural teeth. Parts of the restorations had to be thickened to pass the minimal requirements of the software, even though I reset the minimum to 0.5 mm. In addition, the occlusal anatomy required adjustment, since we were trying to blend it all to the natural teeth. We had to use the “Function” key to rotate, enlarge, add, smooth, move, and remove each restoration, just as if we were waxing with wax (Figure 4).
The original occlusion was then checked to make sure we had ideal contact with the new occlusion. Our final restorations were
then ready to be sent to our inLab MC X5 milling unit.
Fig. 5 through 7 Milling restorations with inLab MX 5.
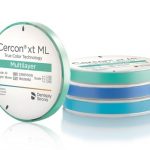
The inLab CAM software received the files to mill. Each of the twelve restorations was placed, sprued, and set to wet mill. Restorations were then milled on the inLab MC X5, a 5-axis milling unit which can be used for wet or dry milling (Figure 5 through Figure 7). The inLab MC X5 unit milled the temporary restorations (Figure 8) using a PMMA puck (Figure 9).
The temporary PMMA restorations were then ready for delivery (Figure 10). After they were placed and used for a few weeks, the patient was completely satisfied with the look and feel. The final restorations were then milled using the same technique.

Fig. 8 Milling temporary restorations with inLab MC X5 unit.

Fig. 9 Milling using a PMMA puck.

Fig. 10 Temporary restorations ready for delivery.

